Beauty
Everything You Need To Know About Eyebrow Mapping
It’s the key to perfectly even eyebrows.

With your pencil perfectly sharpened, precision tweezers in hand, and your face an inch away from a mirror, trying to perfect your eyebrows can feel like a high-stakes game. One wrong move, and ... well, you’re just a little late for dinner. But even if the stakes aren’t that high, flawlessly shaped brows are the cherry on top of any beauty look — whether going full glam or opting for the no makeup-makeup vibe.
Having trouble getting your eyebrows to look like identical twins rather than distant cousins? There’s a beauty hack for that. It’s called eyebrow mapping, a method that promises to help novices and professionals alike shape symmetrical arches using precise angles and their own facial features. While the technique isn’t new, it’s gaining in popularity with its hashtag gaining over 11 million views on TikTok (and there’s even a brow mapping filter). Here, a comprehensive breakdown.
What Is Eyebrow Mapping?
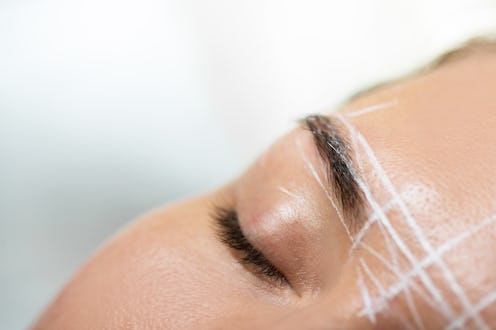
Eyebrow mapping involves using a pencil or other straight-edge tool (or an inked string) to pinpoint key locations on the face and around the eyebrows, creating a “blueprint” of sorts for hair removal or makeup. Simply put: “Brow mapping is the art of using the natural features of your face to build the framework for shaping and creating the perfect, aesthetically pleasing brows,” explains Chanel brow artist Jimena Garcia.
The general rule of thumb is that the front of your eyebrows should start above the dimples in your nose (FYI, you can find this point by looking straight ahead in the mirror and marking where your nostril starts to flare out), the arch should sit above the outermost edge of your iris, and you should be able to connect a straight line from the outer edge of your nostril, to the outermost corner of your eye, to the tail end of your brow. “The main goal,” Garcia explains, “is to create natural brows which are symmetric and complement your face.” She adds, “Eyebrow mapping can lift, intensify, and elongate the look of the eyes.”
A Beginner’s Guide To Eyebrow Mapping
There are a few different approaches. For beginners, Garcia recommends a simple connect-the-dots approach, where you use a straight-edge tool and dots to identify and mark the front of the brows, the arch, and the tail.
Step One
Grab a white eyeliner pencil and another thin pencil to use as your guide. Starting from the dimple of your nose, lay your guiding pencil vertically past the inner corner of your eye to pinpoint where your brows should start. Mark white dots at the top and bottom front of your brow.
Step Two
From the dimple of your nose, lay your pencil diagonally so that it’s in line with the outermost edge our your iris. That’s where your arch should lay. Mark dots at the bottom arch and where you’d like the top of your arch to land.
Step Three
Find the point where tail of your brow should end by laying your guiding pencil from the side of your nostril to the outermost corner of your eye and up to your eyebrow. Mark that location with a white dot.
Step Four
Repeat the first three steps on your other eyebrow. From there, use the white pencil to connect the dots and create a frame. Shape or fill in, then use your go-to makeup remover to carefully erase your guidelines.
An Advanced Guide To Eyebrow Mapping
Once you’ve mastered the connect-the-dots method, you can opt for an inked string (eyebrow thread that’s already pre-inked with charcoal or cosmetic ink) or you can color a piece of regular thread yourself with an eyebrow pencil or eyeliner. It’s a similar method, but has a few additional steps.
Step One
Using the nose as a guide, mark the center of your face. The line should be right between your eyebrows.
Step Two
From the dimple of your nose, stretch the vertically thread upward toward the corner of your eye. and mark it with the thread. This is the front of your brow.
Step Three
To pinpoint your arch, mark a diagonal line that connects from the the dimple of your nose, to the outermost corner of your iris, to your eyebrow.
Step Four
Find the tail of your brow by using your thread to mark a line from the outer edge of your nostril, to the outer corner of your eye to your eyebrow.
Step Five
Repeat steps 2-4 on the other side. Then, use your thread to horizontally connect both the top and bottom of the front of each eyebrow.
Step Six
Mark a horizontal line that connects the top of each arch to help with symmetry.
Step Seven
From there, create the frame for each brow by connecting the top front, to the top arch, to the top tail. And then use you thread to connect the bottom front, to the bottom arch, to the bottom tail.
Step Eight
Shape or fill in, and then carefully remove your map using toner, micellar water, or a makeup wipe.
This article was originally published on