Style
I Used Bra Inserts To Apply My Makeup & It Worked

If the struggle for seamless foundation is something you’re very familiar with, you may have already heard that beauty vloggers are starting to use special silicone sponges to achieve the perfect blended look. But being that most of these jellyfish-looking sponges have already sold out online, some makeup gurus are turning to cleavage-boosting bra inserts (yes, you read that right) to get a similar airbrushed finish.
“Foundation is usually not absorbed by silicone,” says makeup artist Amanda Balderas through email. “This is something that can be extremely beneficial, as you can conserve your foundation and not waste it. Cleaning silicone images is also easier, as since there usually is little to no product left on it after rinsing it with water and brush cleaner.”
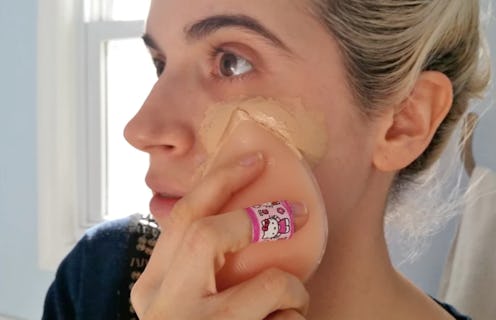
I've tried all kinds of weird beauty products and fads in the past, but never have I turned to a silicone breast enhancer shaper to achieve the perfect foundation look. So, willing to see if it a boob-boosting cutlet was better than my beloved beautyblender, I tried out this beauty dupe for three days to see if it was the real deal. Here’s how the whole thing went down.
Day 1
Being that most SiliSponges cost around $9, I didn’t feel too bad spending $8 on my bra insert dupe found on Amazon. Both sponges seemed to have a similar squishy texture, and I was pretty sure the cleanup would be a breeze.
However, actually applying my makeup with the cutlet proved to be a bit tricky, especially since this was my first time. Taking a page from beauty extraordinaire Nikkie Tutorials, I grabbed some thick liquid foundation, and slowly dabbed the foundation onto my face using my cutlet. Doing so was a bit tricky, but my cutlet did manage to get my product onto my face without any embarrassing streaky fails in between.
While I still needed pressed powder to blend together the whole look, I was quite surprised how decently my foundation went onto my face. Yes, there were some cracks I had to fill in, but the whole application process wasn’t too messy, uneven, or overly complicated.
Even cleaning my cutlet proved to be a piece of cake, as some castille soap and a quick rinse was all I really needed. To be completely honest, the whole job took under five minutes, and took much less time and effort than it normally does to clean my brushes.
Day 2
While a thicker BB cream didn’t go on as patchy as my liquid foundation, I still needed a bit of powder to help set the look.
However, applying on a liquid highlighting shade on top of my BB cream definitely surprised me, as it didn’t go on a streaky as I feared.
I still needed a finishing highlighter powder to top it all off, but it definitely sped up the whole foundation process for sure.
Again, cleaning my cutlet is a lot easier and faster than what I normally face with my makeup brushes. Not only does my foundation easily wash off, but starting with a clean applicator daily has been a major plus. Hopefully this means less breakouts and blemishes going forward.
Day 3
Applying my foundation still took less than 15 minutes, and my cutlet was very easy to clean the third time around. Even when I applied a mixture of BB cream and liquid foundation onto my face, I still liked the results.
Like the days before, I still have to use a good finishing powder to blend and set each look, but overall I have been in awe of how well the cutlet transfers product onto my face.
Being that this was third and final day of my experiment, I wanted to stress that this is something that I will continue to use going forward. Not only does a good cutlet work wonders for thicker foundation looks, but the low-maintenance clean time is something that totally has me coming back for more. I can’t believe I didn’t try this out sooner.
Final Verdict
Some beauty dupes may not be all hype, but using cutlets for foundations is definitely one beauty hack worth trying out. Not only is it way more affordable than most foundation sponges and brushes, but the easy and painless cleanup is definitely worth considering.
However, will it replace it replace the beautyblender altogether? Probably not! Especially since makeup artist Vanessa Ungaro of LAUREN + VANESSA thinks that the beautyblender still provides a more natural finish.
“I really like the idea of using a silicone tool because it much easier to clean so bacteria won't grow on or in it,” says Ungaro via email. “However, you really can't compare this to a beautyblender, as they give two different applications. A beauty blender can be heavier or give a natural seamless look. The silicone will be super heavy but probably why some of the bloggers like it.”