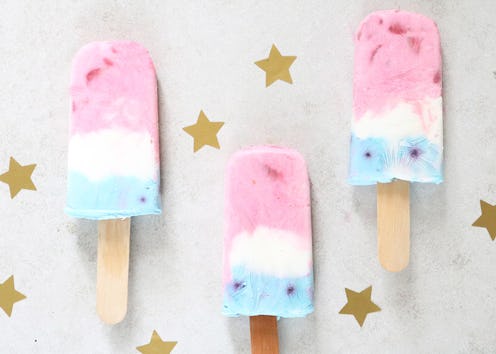
When summer comes around, you cannot go wrong with ice pops. They are the perfect way to cool down while getting festive. For example, take a look at these red, white, and blue popsicles for the Fourth of July. These treats are easy to make, customize, and eat. It does not get any better than that.
OK, so maybe ice pops are viewed as a kid's dessert. But who says children get to have all the fun? As an actual grown-up, you have the right to enjoy red, white, and blue desserts. Top it off with Independence Day drinking games and you have got yourself a party.
Here is the best part. This recipe uses yogurt, so you can forget about all those sugary fruit juices. The result is a delicious and nutritious treat. You will even get a dose of calcium, vitamins, and good bacteria called probiotics. Your skin and stomach will love it.
If you are not a fan of dairy, do not fret. You can easily make turn this into a tasty vegan dessert. Simply replace normal yogurt with coconut or soy yogurt. For an extra vitamin boost, add lots of fresh fruits. Summer has never tasted so good.
Yields: Four ice pops
Ingredients:
- 1 cup strawberry, raspberry, or cherry yogurt *
- 2 cups plain, vanilla, or coconut yogurt (separated) *
- Chopped strawberries, raspberries, or cherries
- Blueberries or blackberries
- Red and blue food coloring
- Ice pop molds, wooden ice pop sticks (optional), aluminum foil
* You can also use three cups of plain white yogurt.
1. Add a few drops of red food coloring to pink or white yogurt.
If you'd like, add chopped strawberries, raspberries, or cherries. Mix well.
2. In the second cup of yogurt, mix in a few drops of blue food coloring. Add blueberries or blackberries.
3. Add a layer of pink/red yogurt to the ice pop molds.
If you'd like, wrap a clean paper towel around your finger and wipe around the inside. This will remove some of the pink yogurt so the next color looks somewhat separated.
4. Add a layer of white, then a layer of blue.
5. Typically, ice pop molds include plastic sticks with handles. Feel free to use them.
I decided to ditch these, since my mold happens to be the same color as the blue yogurt. I wanted the blue to stand out, so I used wooden sticks and aluminum foil.
To use this method, place a sheet of foil over the molds. Carefully cut slits with a sharp knife. Insert the wooden sticks.
6. Pop in the freezer until the yogurt sets. Leave it overnight, if possible.
When it's time to party, run each mold under warm running water. The ice pop will slide right out.