Fashion
A Homemade Almond Butter Recipe for Your Face

Straight spoonfuls of almond butter is an undeniably delicious snack, but recently I've taken to using the stuff in my homemade skin care as well. While putting store-bought almond butter on your face can be risky because of potential additives or preservatives, making your own almond butter is far easier than it sounds. And after it's done, you can apply it on your skin for an exfoliating mask that will slough away dead cells and plant some nutrients directly on your face.
You may be familiar with the benefits of almond oil for relieving dry skin and sealing in moisture, but there are plenty of other benefits to our favorite nut. According to sources at Naturally Nutty, almonds are rich in vitamin E while has been known to help speed up the healing process, particularly with acne scars. Almonds contain healthy fats, protein, and fiber as well as antioxidants that promote healthy skin.
One of the easiest masks you’ll ever make is this almond butter recipe; I will admit that I get jealous anytime I give this mask to a customer. My nut allergy may keep me from using this on my own skin, but a pair of gloves has me making a decadent mask for all my pals without a nut allergy to reap the benefits from. Here's how to do it yourself at home.
1. Choose Your Almonds Wisely
Since this recipe is going to be used solely for beauty purposes, avoid flavored nuts and try to stick with a raw, organic nut to ensure you don't get any unnecessary preservatives on your beautiful face.
2. Give Your Almonds A Gentle Roast
Typically, I try to avoid heating anything in order to keep the maximum amount of nutrients in my ingredients, but according to sources at Crunchy Betty, cooking raw almonds will soften them up a bit. You definitely don't want to put anything incredibly coarse on your skin. Spread them on a baking sheet at 375° and keep them roasting for about 10 minutes.
3. Feel Free To Manually Crush
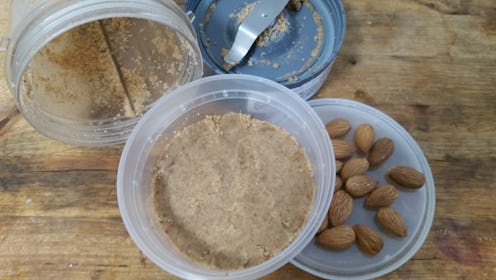
You can throw your almonds in a heavy-duty food processor and have them ready in no time. Since I'm using a NutriBullet, I used a muddle to crush my almonds up as best I could before adding them into the blender. I suggest doing this for anyone who is worried about hurting their blender.
4. Blend Your Almonds
Once you begin blending, you'll notice the almonds become powder quickly, but turning almonds into a thick paste as opposed to powder will take several more minutes. Keep an eye on your future butter and remove the lid to give it a stir if necessary.
5. Add To Your Almonds
Some sources suggest adding a little almond oil to your butter to give it the desired thickness; this should work wonders if you're eating your almond butter or if you have skin that dries out easily from exfoliating. I personally prefer adding tea-infused water for my oilier complexion. Waiting for your almonds to turn to butter can be a time-consuming process, but all you have to do is watch and stir occasionally!
6. Store Your Almond Butter
Keep your almond butter in a sealed container for future use. You can start applying on make-up free skin with a little bit of water as soon as your butter has formed. Use this gentle exfoliate as needed and add any delicious ingredients like bananas, honey, or milk!
Image: Kristin Collins Jackson; Ummu Laelatul / 500px/500Px Plus/Getty Images
This article was originally published on