Fashion
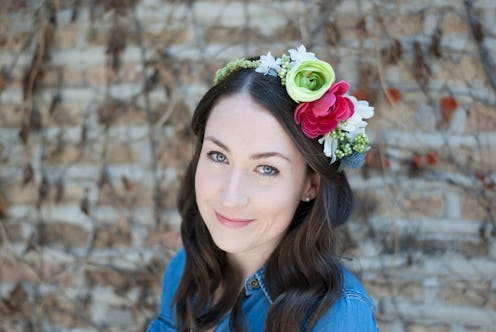
How To Make A Flower Crown In 7 Steps Or Less

If you’re a woman between the ages of 16 and 30, you’ve probably tried on a flower crown at Forever 21. You’ve also probably walked over to a mirror thinking you looked like Frida Kahlo (minus the brows). But surprise! It actually looks like a parrot gave birth on your head. Whether you’re heading to a music festival, walking down the aisle or looking for a summer craft project, flower crowns are easy to make, not to mention a super fun DIY activity for you and your girlfriends to do together. Plus, being able to customize your headpiece—and ixnay glitter, fake butterflies and cantaloupe-size blooms—ensures a perfect fit you'll wear again and again.
But first, learn from my mistakes and read these tips before you get started:
Pro Tips:
- Check out your favorite florists on Instagram before you hit the craft store. Take a look at what kinds of flowers, colors and textures go well together to get a feel for what kind of crown you’d like to make. Trust me, it will save you hours and a possible anxiety attack in Michael’s.
- Buy more flowers than you need and return what you don’t use. The possibilities are endless (and somewhat overwhelming), so don’t pigeonhole yourself with limited options.
- Don’t forget the greenery! If you’re anything like me, you’ll end up with a basket full of bright blooms that would make a beautiful bouquet. But trust me, you’re going to need the green stuff too. Pick up branches, leaves and filler material while you’re there.
- Remain calm and start over if you need to. This flower crown was created after three failed attempts, two naps and one Cadbury egg. Getting the right combination can be tricky, and sometimes starting over is the only solution. You’re not a failure, I promise.
What you’ll need:
- Wire cutters
- Floral wire
- Silk flowers and greenery
- Grapevine wire
- Floral tape (optional)
What you’ll do:
- Start by creating the base of your crown. Measure out a piece of grapevine wire that will fit around your head (size will depend on how you want to wear it). A slightly loose fit is best, as the flowers and greenery will need some breathing room. Secure the crown by twisting excess wire around the base and trimming the rest.
- Cut one or two pieces of long greenery that will wrap around the base. I opted for these seafoam green-colored tendrils. Fasten the greenery to the crown with floral wire. Simply cut two-inch pieces of wire and loop them around the greenery and base for a secure fit. I left about an inch between each fastener.
- Repeat step 2 to cover the second half of the crown if necessary.
- Begin adding flowers to your crown. I recommend starting with smaller flowers and working your way up to big blooms (these prickly thistle blossoms were perfect). Each flower is different—some already have wire stems, while others sit on plastic bases. Attach the flowers to the crown by either wrapping their wire stems around the base or by fastening their plastic stems to the base with floral wire.
- Continue attaching flowers, considering size, color and shape. There’s no exact science to this process, which is why floral tape is optional. If you choose to use it, loop it around the exposed wire for a super clean, polished look.
- Make sure each flower sits right next to its neighbor, and don’t forget to add touches of filler and leaves between each bloom. These tiny, green berries did the trick.
- Tuck or trim any loose wires and stems for a comfortable crown. Viola! You’re ready to conquer Coachella, bridesmaid duties or a perfect summer evening.
Images: Morgan Olsen; Michael Williams