Fashion
How To Try The Clumpy Mascara Trend

In case you haven't noticed, clumpy lashes are continuing to have a moment. Somehow they've gone from the last thing a mascara lover could want to an actual beauty trend. Thanks to the recent surfacing of this trend on the runway as well as products like Maybelline's Volum' Express The Colossal Spider Lash Mascara ($7, ulta.com), clumpy lashes are suddenly everywhere.
At first I scoffed at the idea. After all, why would I want to give myself clumpy lashes after spending most of my adult life desperately trying to avoid the look? One of the worst things you can say about a mascara is that it clumps. I tried several products specifically for the clumpy look, and I still couldn't get on board for a while.
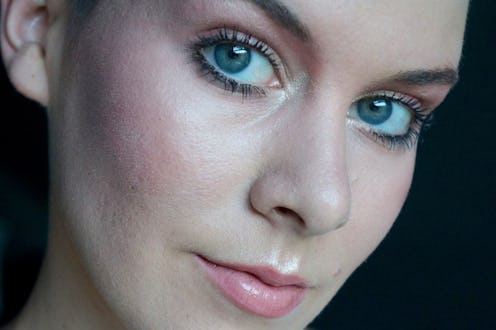
When I finally did come around to the trend, it was in a roundabout way. I really liked Lisa Eldridge's draping tutorial and tried it out on myself. Although the look was mainly about blush, it also included very thick, clumped-up lashes. I decided to go for it and was surprised by how much I liked the lashes. Then when I went out that night, I was happy to find that my lashes stayed voluminous and curled for the entire night. You could even notice them in pictures, which was a big deal for me since I've always had short, stick-straight lashes.
After that I was sold on the clumpy lash trend. Sure, it's not the most subtle look but it gives me the falsies effect without actually having to wear false lashes. Plus it's really easy to do. I'm going to break it down into five steps in case you want to try out the trend yourself.
Before we get clumpin', here's what my natural lashes look like, for reference.
1. Use A Heated Lash Curler
Tweezerman ProMaster Lash Curler, $22, Sephora
You can actually buy a heated lash curler now from several brands but I'm cheap and happen to really like the non-heated lash curler that I already use. My Tweezerman ProMaster Lash Curler actually manages to reach all of my lashes, even the ones at the outer corners. So I simply take a lighter and spend just a few seconds heating up my lash curler (I hear hot water or a blow dryer works well too). Please be very careful if you do this. I test it carefully with my finger to make sure it's not too hot before I put it near my eye. It really helps to curl my lashes better and make them stay curled longer.
2. Focus On The Roots First
Next, take a volumizing mascara that has a formula on the wetter side and apply it to your curled lashes. I like to use CoverGirl LashBlast Volume Mascara or Essence Lash Princess Volume Mascara but any mascara that promises volume will do. Focus on the roots first by placing the mascara wand in a stamping motion as close as you can get to the lash line. Then, wiggling the wand slightly, disperse the mascara through the rest of your lashes. I try to start out with a light hand because I don't want things to get too clumpy too quickly.
CoverGirl LashBlast Volume Mascara, $6, Amazon; Essence Lash Prince Volume Mascara, $9, Amazon
3. Use The Mascara Wand Vertically
Next take the mascara wand and hold it vertically as you sweep it upwards from the roots to the tips. This ensures that every lash gets coated and that, yes, some of them will clump together. It also helps my lashes to stick upwards instead of going straight out.
4. Wriggle The Wand Along Your Lower Lashes
Don't forget about your lower lash line. I know some people prefer not to put mascara on their lower lashes but I would personally never skip this step. Try to use a mascara that you find doesn't smudge or flake, and if you do get some mascara smudged under your eye just clean it up with makeup remover on a Q-tip when you're done. For a clumpy look, simply wiggle the mascara back and forth as you go to make the lashes stick together and look thicker, focusing on the roots first and going lighter as you reach the tips.
5. Curl Your Lashes A Second Time
In general, I don't think anyone recommends curling your lashes after applying mascara. I've become addicted to this easy extra step though. By curling the lashes again while they're still wet with mascara, it will make more of them clump together as well as really forcing them to hold the curl for the rest of the night.
By the end of this, my lashes look thick, dark, and bold. There's definitely some clumping going on but not as much as you may have seen in some editorial looks. This is more doable for every day. If you prefer a natural look then this probably won't be for you, but if you really want your eyes to stand out then give it a try.
Images: Kelly Dougher