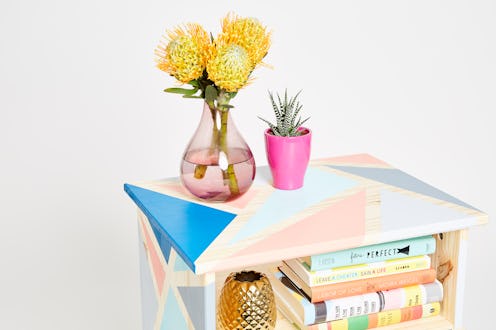
Even if you're well out of school and living in your own place, there are always those few pieces of furniture that stick around — whether you like it or not. Maybe it's a storage piece from your dorm room, a hand-me-down coffee table from your first apartment, or a dresser you bought on a budget but never really *loved*. You know the one, and you've definitely contemplated getting rid of it a few times. But the reality is, as much of a grasp as you may have on your personal home decor style, purchasing all new everything can be daunting (and very expensive). Finding a balance between old and new is both economically responsible and the key to curating a home that looks and feels totally unique. The trick is figuring out how to work with what you've got, and revamping old furniture yourself is a great way to split the difference.
In partnership with Sherwin-Williams®, I took a super basic side table and DIY'd my way to a brand new little statement piece. With just some paint, masking tape, and a shiny new knob, it was almost too easy to take this table from undeniably boring to possibly Pinterest-worthy. And the best part about doing it yourself is having total control over the colors and look you're going for. In just a couple of hours, you can have a piece that both complements your home and can't be found anywhere else. It's a total win-win.
What You'll Need
- One piece of furniture that needs a makeover. I used a sanded pine side table, but if you're using something with a finish or any surface damage, I'd recommend sanding and priming your piece before you begin.
- Masking tape
- Foam brushes, assorted sizes
- New hardware — in this case, a brand new drawer knob
- Sherwin-Williams Emerald® Interior Acrylic Latex Paint in assorted colors of your choice. I used the colors SW 6765 Spa, SW 6605 Charisma, 6246 North Star, SW 6239 Upward, and SW 6790 Adriatic Sea.
1. Tape Off Your Design
Use your masking tape to mark off the sections you want to paint. I chose to make all of my shapes triangular, but any design you like will work — get as abstract as you want! If your piece has a drawer, remove it and tape it separately.
This is also the time to remove any knobs or handles you might be replacing.
Be sure to press your tape down firmly so that paint edges stay clean.
Tape any edges or interiors that you think might be in at risk of unwanted paint. Make sure to double-check all of your sides, both interior and exterior.
2. Apply Your First Coat
Using a different foam brush for each color, carefully coat each section with paint. Space colors out however you wish.
I tried to keep my color placement simple and deliberate to juxtapose the abstract pattern.
3. Apply Your Second Coat
Once the first coat has dried, apply a second. Be sure to stay inside of your tape lines, cover all of your edges and corners, and coat wood smoothly and evenly.
It's fine to get a little paint on your tape (that's what it's there for!), but be sure not to overlap onto neighboring sections.
4. Remove The Tape
Once your paint is almost dry, carefully remove the tape. Spoiler alert: This part is extremely satisfying.
Don't wait until the paint is fully dry to take off your tape strips. Your lines will be crisper and more defined if the paint is still a tiny bit wet.
Once all of your tape is removed, make sure that each piece (if there are more than one) are fully dry before re-assembling.
5. Swap Your Knob
Now that your pieces are fully dry, this is the time to put on any new hardware. A fresh knob can do a lot more than you'd think.
Ta-da! You're basically ready to go.
6. Style Your New Piece
A little accessorizing can do wonders. Looking brand new is cool, but personalizing a piece like this with your favorite books and knick knacks will add inimitable, lived-in charm.
This post is sponsored by Sherwin-Williams®.
Photography: Lauren Perlstein; Art Direction & Prop Styling: Jenna Wexler