Fashion
13 Spring Nail Art Tutorials To Bring In Some Sun

It's that time of year again when you can be bundled up in boots one day, and contemplating your flip flops the next. It's also the perfect time to let some spring nail art tutorials bring some more permanent sunshine into your life. Because even though early spring may be a little confused about leaving winter behind, you don't have to be. At least when it comes to your nails.
Most of these nail art tutorials can be accomplished with simple tools, such as toothpicks and scotch tape. They're beginner-level for the most part, but don't despair if you don't master the on the first try. You're watching videos by people who have had endless practice.
Also keep in mind that while the recommended colors are fab, you can use whatever spring colors you're feeling. And you can always do one nail as an accent nail if the idea of doing nail art on ten fingers fills you with fidgeting anxiety (or boredom).
Once you're done, you can stare down at your digits when that final March snowfall dashes your picnic dreams, because at least it will always be spring on your manicure. And you can still host an awesome indoor carpet picnic.
1. Easy Florals
Not one, but three easy spring floral nail art looks. If you don't have dotting tool, you can use a toothpick, bobby pin, or the tip of an old pencil. Oh, hi, spring flowers. Bet you didn't know I could make you!
2. Fashion Week-Inspired Floral
This one comes inspired by the runway, and it's also perfect for beginners. You can mostly just use the brushes that come in your polish. This one's a little more bold for those who aren't so into the delicate florals. It also rocks some trendy gold accents.
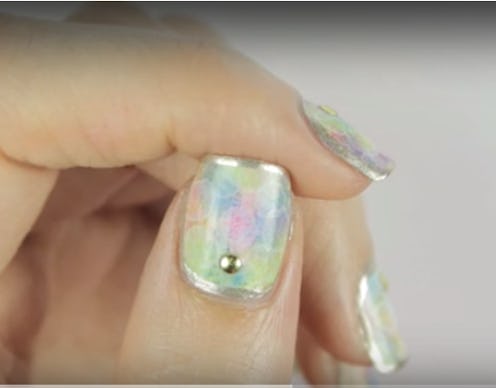
3. Pastel And Gold Watercolor Bokeh
This one borrows from photography lights called bokeh, which makes it look like you have really fun, but subtle bubbles on your nails. The colors are also perfect for spring, and the option to add in the gold accents is #stylegoals
4. Scalloped Nails
Part stripe, part Easter egg, this mani uses new colors from the Essie spring line. It looks just as cute as a striped mani without the scallops.
5. Bunny Ears
If spring is less about florals and more about baby animals, or Easter, these cute bunny ear nails are right up your alley. They look complex but the techniques are easy, so you'll impress all your friends with your skills.
6. Spring Polka Dots
This is a great mani to keep in your pocket year-round, but this time it uses pastel colors and a matte topcoat for that spring feel. Kelli uses liquid latex for easier clean-up, but you can skip it or use white school glue in its place.
7. Minimalist Colorblock
This one takes from the negative space and colorblock trends and gives them a spring twist. It seems complicated at first, but if you take it step-by-step, you can totally do it. It looks really impressive, too, FYI.
8. Highlighter Art
This one is so neat! Bust out your school supplies and color on your nails like you're bored in study hall, except use a white base coat instead of white-out. Wait, do people even still use white-out? Did I just show my age? Anyway, it looks like a floral from a distance, and a Monet painting.
9. Pastel Geomeric
This is a gel tutorial, but you don't need to use gels. You could also use striping tape to create sharper white lines. You can also use any color combination under the sun, which makes it another great mani to keep in your arsenal.
10. Toothpick Nails
This video shows you how to make five complicated-looking, spring-appropriate manicures with just a toothpick. I've tried all of these and they're all pretty easy. Don't forget the fast-drying topcoat, though.
11. Shamrock Watermarble
Watermarble is my nemesis. It's a little bit tricky to master, but it does look cool, especially for shamrock-inspired manicures. If you don't like to wear green clothes, but still want to show your Irish pride (or just avoid getting pinched) these are a fun option.
12. Green And Gold Plastic Bag Nails
This tutorial features three looks, but the most notable is the first one, which features the plastic bag technique. The result is a neat, marble design that would look good in a variety of colors.
13. Rainbow Bumblebees
If you're the queen bee of your squad, this one's for you. Robin uses acrylic paint, which is common in nail art because it's easier to do more complex designs. It says put with topcoat, and no one will ever be able to tell that you took a slightly easier route. Also, there are rainbows. So, win.
Just like with anything, nail art takes a little practice. Just don't give up on it and you'll be a pro in no time. You got this! But if you don't feel like mastering yet another skill, you can also show any of these designs to your nail tech or nail artist.
Images: Cutepolish/YouTube