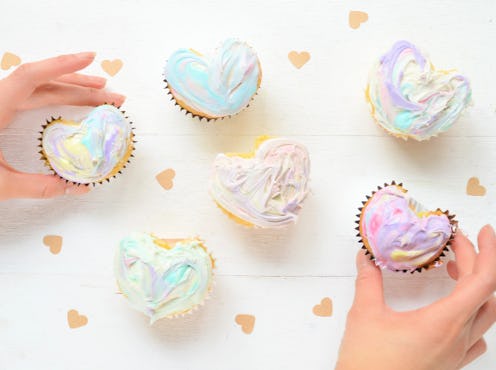
Is it just me, or does it feel like we were all just celebrating New Year's Eve a few days ago? Suddenly, it's time to start thinking about Valentine's Day, date ideas, and Valentine's Day cupcakes that are shaped like hearts. And even if you're not a fan of the holiday, you can't deny the greatness of V-Day's delicious treats.
This year, I decided to tap into my inner unicorn goddess (yeah, that's a thing) and whip up a batch of colorful tie-dye frosted cupcakes. And as a lady who loves to wear black, this proved to be a super interesting endeavor. It made me realize that I don't mind embracing the cutesy things in life... even if it's in the form of cupcakes shaped like hearts. Yup, that's also a thing.
At the end of the day, I'm a sucker for anything quirky, creative, and clever. These cupcakes are exactly that. Using ordinary glass marbles, you can create heart cupcakes without fancy supplies or materials. These are the kinds of things that make me swoon. Future life partner, I hope you are taking notes.
With these instructions, you can transform your favorite cupcake recipe into a Valentine’s Day treat for that special someone. Happy V-Day!
Supplies:
- Cupcake tin- Cupcake liners- Cupcake batter- White icing- Glass marbles- Butter knife- Small containers (bowls, cups, etc.)- Food coloring - Scissors, plastic icing bag, icing tip (optional)*
I tried this heart-shaped technique with both paper and foil cupcake liners. I highly recommend using the latter; bending an indent for the top of the heart is much easier!
* These items are necessary to use if you don't have metal piping tips for perfectly frosted cupcakes. If you're familiar with the process, then go for it! Otherwise, this particular tutorial demonstrates how to create the tie-dye frosting with basic kitchen supplies.
1. Line the tin with cupcake liners. Place two to three marbles in each section; this will create an indent and a subtle heart shape.
Again, foil cupcake liners will make things much easier. You can pinch each foil liner to emphasize the fold.
2. Time to bring in the cupcake batter! Don't feel ashamed about using the boxed kind. It can save the day when you're pressed for time.
Take care to fill each compartment only one-third of the way full. Otherwise, the hearts will burst with a little too much love.
Pop the cupcakes in the oven according to the box's directions (or the recipe you're using).
3. While the cupcakes are doing their thing, prep the frosting. Separate small amounts into multiple bowls or cups. Add a few drops of food coloring to each container.
The more drops you add, the more saturated the colors will be. I left a bigger container of all-white frosting to act as the "canvas" for the colors.
Want super colorful hearts? Ditch the white frosting all together. Your cupcakes, your rules.
4. Mix well. Use a clean spoon for each color to prevent the shades from mixing together.
5. Now, here's the fun part. Add dollops of frosting into one larger container.
6. Using the butter knife, stir the frosting a few times to create a swirl of colors.
Keep in mind that over mixing will create a muddy shade. A quick stir is all you need.
7. Once the cupcakes are good to go, let them cool completely. If necessary, hold each side of the cupcake and gently bend outwards. This will help emphasize the heart shape.
8. Dress up each heart cupcake with colorful frosting. Love, love, love.
How charming are these lovelies? This quick and easy dessert idea is perfect if you want to spruce up your average cupcake recipe.
Oh, and if you gift these to yourself... I won't judge you one bit.
For more DIY inspiration, check out Bustle on YouTube.
Images: Kirsten Nunez