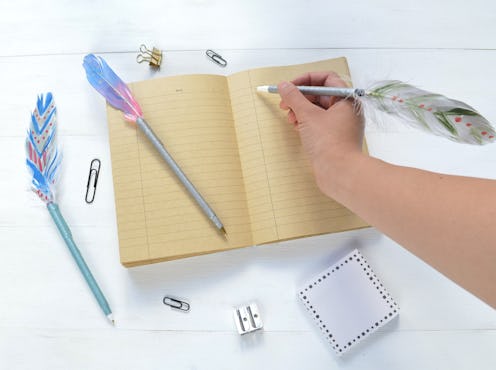
With back-to-school season in full swing, I keep getting lost in the aisles of school supplies. Then again, who am I kidding? I'm pretty sure I do that on any old day. Whenever I open up a new pack of pens, I can't help but feel like I'm about to do something totally productive and badass — and these awesome DIY feather pens make me feel downright unstoppable.
Pens are a necessity of everyday life. This is true whether you're working a big girl job, or hitting the books. And since we all secretly wish we could write with quills like the cool kids, I decided to turn ordinary pens into feathery works of art. These are especially perfect if you've been wishing you were attending Hogwarts this year. Plus, they're super fun to make (and use!).
For these pens, I used acrylic paint to create simple bohemian-inspired patterns. Of course, you can do your own thing and design whatever you like. For some serious school spirit, use your team's color palette. Want something more minimal? Choose one or two colors for a sweet and simple look. Thanks to the nature of this DIY, you can go in any direction. Write on!
Supplies:
- Acrylic paint
- Paintbrush
- Large craft feathers
- Scrap paper
- Strong craft glue (or hot glue)
- Pens
- Washi tape
Directions:
1. Place a feather on the scrap paper. Apply acrylic paint to sections of the feather. There's no right or wrong way to do this — add paint wherever you want some color!
2. Add another color or two (or three or four). Paint on dots, stripes, and everything in between. Anything goes with these guys.
3. Paint a few more feathers, if you'd like. Let them dry completely.
Tip: To create a light wash of color, thin the acrylic paint with water. This is perfect for blending shades together, creating an ombré vibe. Check out the feather in the center; how pretty is that?
4. Glue the stem of the feather to a pen. It doesn't matter which way you face the feather; you'll be able to see it either way.
5. Glue the end of the washi tape to the top of the pen.
6. Tightly wrap the washi tape around.
7. Continue wrapping until the entire pen is covered. Smooth down any bumps. The awesome thing about washi tape is that it's easily re-positionable. If you mess up, it's easy to do over!
Images: Kirsten Nunez